| ACTIONI/Q®
Q116 AC Powered RTD Input Limit Alarm |
|
Provides Relay Contact Closures at a Preset RTD Input Level.
|
|
Features: |
-
Field Configurable Input Ranges
- TouchCALTM Technology
- Setpoints Programmable
HI or LO and Failsafe or Non-Failsafe
- DIN Rail Mounting
with IQRL
- Universal AC Power
85 to 265 VAC
- 24VDC Transducer Excitation
- SnapLocTM Plug-in
Terminals
- ASIC
Technology
|
 |
|
|
 |
 |
 |
 |

|
|
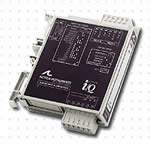
Description
The ActionI/Q model Q116 is
a DIN rail mount, RTD input
limit alarm with dual setpoints
and two contact closure outputs.
The field configurable input
and alarm functions offer flexible
setpoint capability. There are
up to eight temperature ranges
available for each RTD type
to ensure accuracy and maximize
setpoint resolu- tion.
The
Q116 is configurable as a single
or dual setpoint alarm, with
HI or LO trips and failsafe
or non-failsafe operation. Also
included are adjustable deadbands
(up to 100% of full scale input)
for each setpoint and a universal
AC power supply which accepts
any voltage between 85 and 265VAC.
TouchCAL
Technology
Action has simplified setpoint
calibration. Using a pushbutton
instead of potentiometers, improvements
in calibration resolu- tion
are realized due to the elimination
of the potentiometer's mechanical
variability.
For
calibration, simply input the
signal level of the desired
trip and press the pushbutton
to store it in non-volatile
memory. Deadband is entered
the same way with another pushbutton
press to store.
Diagnostic
LEDS
The Q116 is equipped with three
front panel LEDs. The green
LED is a dual function LED labeled
IN, which indicates line power
and input signal status. Active
AC power is indicated by the
illuminated LED. If this LED
is off, check AC power and wiring
connections. If the input signal
is 7% above or below the configured
input range the green LED will
flash at 8Hz or 4Hz, respectively.
The
two red LEDs indicate the relay
state of each setpoint. An illuminated
red LED indicates the tripped
condition for the respective
setpoint.
Output
The Q116 is equipped with two
SPDT (form C) relays, rated
at
120VAC or 28VDC at 5 amperes.
Each of these relays is indepen-
dently controlled by the field
configurable setpoint and deadband
.
|
|
Operation
The Q116 limit alarm setpoints
can be configured for HI or
LO, failsafe or non-failsafe
operation. Each of the setpoints
has a respective HI or LO deadband.
In a tripped condition, the
setpoint is exceeded and the
appropriate red LED will illuminate.
The trip will reset only after
the process falls below the
HI deadband or rises above the
low deadband (see Figure 1).
For proper deadband operation,
the HI setpoint must be set
above the LO setpoint. In failsafe
operation, the relay is energized
when the process is below the
HI setpoint or above the LO
setpoint (opposite for non-
failsafe). In the failsafe mode,
a power failure results in an
alarm state output.
Dynamic
Deadband
Circuitry in the Q116 prevents
false trips by repeatedly sampling
the input. The input must be
beyond the setpoint for 100
milliseconds, uninterrupted,
to qualify as a valid trip condition.
Likewise, the input must fall
outside the deadband and remain
there for 100 milliseconds to
return the alarm to an untripped
condition. This results in a
"dynamic deadband"
-based on time- in addition
to the normal deadband.
Configuration
Unless otherwise specified,
the factory presets the Model
Q116 as follows:
|
Input:
|
|
Platinum
(100 ohm) |
|
Range:
|
|
0
to 250 C |
|
Output:
|
|
Dual,
SPDT |
|
Trip:
|
|
A:
HI; B: LO |
|
Failsafe:
|
|
No |
|
Deadband:
|
|
A,
B: 0.25% |
The AC power input accepts any
AC source between 85 and
265VAC.
Note:
An I/Q Rail is required to power
the modules. See ordering information
For
other I/O ranges, refer to Tables
1 through 4 and reconfigure
switches SW1 and SW2 for the
desired input type, range and
function.
|
|

|
 |
 |
 |
|
|
|
|
|
|
|
|
Figure
1: Limit alarm operation and
effect of deadband
WARNING:
Do not change switch settings
with power applied. Severe damage
will result!
1.
With the module removed from
the rail and not powered, snap
off the face plate by lifting
the right edge away from the
heatsink. Slide the heat sink
off the module. Note the input
switches (SW1 & SW2) are
located under the heatsink.
Set positions 1 through 8 on
"SW2" and position
8 on SW1 for RTD type (see Tables
1 & 4).
2.
Set position 1 through 4 of
input range switch "SW1"
for the desired RTD type and
input temperature range (Table
3).
3.
Set position 5 and 6 of input
range switch "SW1"
to ON (Closed) for a HI trip
setpoint or OFF (Open) for a
LO trip setpoint (Figure 6 &
Table 2).
4.
Set position 7 of input range
switch "SW1" to ON
(Closed) for non-failsafe operation
or OFF (Open) for failsafe operation
(e.g., alarm trips on power
failure).
Calibration
1. After configuring the DIP
switches, connect the input
to a calibrated RTD source or
a resistance decade box and
apply power.
Note:
For best results, calibration
should be performed in the operating
environment, mounted on a DIN
rail, allowing at least one
hour for thermal equilibrium
of the system.
2.
After applying power to the
unit all three LEDs will flash
for approximately 10 seconds.
Adjust the input signal level
for the Relay "A"
setpoint. The green LED should
be on. Press and hold the CAL
button for 4 seconds (until
the red LED starts flashing)
to enter the calibration mode.
The green LED will be on and
the red Relay "A"
LED will be flashing.
NOTE:
If the green LED is flashing,
the input is out of range (i.e.
7 % above or below the configured
range). Check to make sure the
input signal is within the DIP
switch configuration range.
Double check the DIP switch
settings.
3.
Setpoint "A": Input
the desired trip level for Relay
"A" and push the CAL
button. The green LED and the
red Relay "A" LED
will be flashing. Note that
the green LED will stop flashing
when the input drops below a
high setpoint or rises above
a low setpoint.
4).
Deadband "A": For
minimum deadband (approximately
0.25%), press and hold the CAL
button for 4 seconds. For high
setpoints, lower the input level
to the desired deadband point
and push the CAL button. For
low setpoints, increase the
input level (green LED turns
off) to the desired deadband
level and push the CAL button.
The green LED will be on and
the red Relay "B"
LED will be flashing.
|
|
5.
Setpoint "B": Input
the desired trip level for Relay
"B" and push the CAL
button. The green and the red
Relay "B" LED will
be flashing. Note that the green
LED will stop flashing when
the input drops below a high
setpoint or rises above a low
setpoint.
6.
Deadband "B": For
minimum deadband (approximately
0.25%), press and hold the CAL
button for 4 seconds. For high
setpoints, lower the input level
(green LED turns off) to the
desired deadband point and push
the CAL button. For low setpoints,
increase the input level to
the desired deadband level and
push the CAL button. The green
LED will be on and both the
red LEDs will be flashing.
7.
Press the CAL button once again
to exit the calibration mode.
Check the setpoint and deadband
to validate calibration.
Relay
Protection and EMI Suppression
When switching inductive loads,
maximum relay life and transient
EMI suppression is achieved
using external protection (see
Figures 2 and 3). Place all
protection devices directly
across the load and minimize
all lead lengths. For AC inductive
loads, place a properly rated
MOV across the load in parallel
with a series RC snubber. Use
a 0.01 to 0.1mF pulse film capacitor
(foil polypropylene recom- mended)
of sufficient voltage, and a
47 ohm 1/2W carbon resistor.
For DC inductive loads, place
a diode across the load (PRV
> DC supply, 1N4006 recommended)
with (+) to cathode and (-)
to anode (the RC snubber is
an optional enhancement).loads,
place a properly-rated MOV across
the load in parallel with a
series RC snubber. Use a 0.01
to 0.1mF pulse film capacitor
(foil polypro- pylene recommended)
with (+) to cathode and (-)
to anode (the RC snubber is
an optional enhancement).
 |
 |
| Figure
2: DC Inductive Loads
|
Figure
3: AC Inductive Loads
|
Table
1: RTD Input Type
Table
1: Q106 Input Range Switch
|
|
|
|
|
|
|
|
|
|
|
|
|
Specifications
Sensor Types: |
Pt100,
Pt500, Pt1000 (0.00385
/ / C); Cu10, Cu100;
Ni120, NiFe604
Sensor Connection: 3-wire.
Input Ranges: see Table
1.
|
| Excitation
Current (Maximum): |
<2mA
for Pt100, Pt500, Pt1000,
Ni120, Cu100 or NiFe604
<10mA for Cu10
|
| Leadwire
Resistance: |
40%
of base sensor resistance
or 100 ohms (whichever
is less), maximum per
lead
|
| Leadwire
Effect: |
Less
than 1% of full scale
over entire leadwire
resistance range
|
| Input
Protection: |
Normal
Mode: Withstands 5VDC.
Common Mode (Input to
Ground): 1800VDC, max
|
| LED
Indicators: |
Input
Range (Green).
>110%
input: 8Hz flash
<-10%
input: 4Hz flash
Setpoint (Red)
Tripped:
Solid red
Safe:
Off
|
| Limit
Differential (Deadband)
: |
0.25%
to 100% of span.
|
| Response
Time: |
Dynamic
Deadband: Relay status
will change when proper
setpoint/process condition
exists for 100msec.
Normal Mode (analog
filtering): <250mSec,
(10-90%)
|
| Setpoints: |
Effectivity:
Setpoints adjustable
over 100% of the selected
input span
Repeatability (constant
temp.): 0.2% of full
scale
|
|
|
| Stability: |
Line
Voltage: 0.01%/%, max.
Temperature: 0.05% of
full scale/ C, max
|
| Common
Mode Rejection: |
DC
to 60Hz: 120dB
>60Hz: 100dB
|
| Isolation: |
1800VDC
between contacts, input
and power
|
| ESD
Susceptibility: |
Capable
of meeting IEC 801-2
level 3(8KV)
|
| Humidity
(Non-Condensing):
|
Operating:
15 to 95% @45 C
Soak: 90% for 24 hours
@65 C
|
| Temperature
Range: |
Operating:
-15 to 55 C (5 to 131
F)
Storage: -25 to 75 C
(-13 to 158 F)
|
| Power: |
2.5W
max.; 100 to 240VAC
+10%; 50-400Hz
|
| Relay
Contacts: |
2
SPDT (2 form C) Relays,
1 Relay per setpoint
Current Rating (resistive):
120VAC:
5A; 240VAC: 2A; 28VDC:
5A
Material: Gold flash
over silver alloy
Electrical Life: 105
operations at rated
load
Note: External relay
contact protection is
required for use with
inductive loads.
Mechanical Life: 107
operations
|
| Wire
Terminations: |
Screw
terminations for 12-22
AWG
|
| Weight: |
0.56
lbs
|
| Agency
Approvals: |
UL
recognized per standard
UL 508 (File No E99775).
CE EN61326, EN61010-1
|
|
|
Ordering
Information
|
| Models
& Accessories |
| Specify
(model number) |
-
Q116-0000
- Specify
I/QRail type and quantity
(required)
- Accessories:
(see Accessories)
- Optional
Custom Factory Calibration:
Specify C620 with desired
input, setpoint and
deadband.
|
| Accessories |
| ActionI/Q
series modules mount on
standard TS32 (model MD02)
or TS35 (model MD03) DIN
rail. In addition, the
following accessories
are available: |
MD02
TS32 DIN rail
MD03 TS35 x 7.5
DIN rail
IQRL-2002 2 Position
I/QRail & DIN rail
IQRL-2004 4 Position
I/QRail & DIN rail
IQRL-2004 4 Position
I/QRail & DIN rail
IQRL-2008 8 Position
I/QRail & DIN rail
|
|
|
Terminal
|
Connection
|
Terminal
|
Connection
|
|
A1
|
Relay
A, N.O.
|
C3
|
RTD
Input (-)
|
|
A2
|
Relay
A, Common
|
C4
|
RTD
Input Return
|
|
A3
|
Relay
A, N.C.
|
C5
|
Not
Used
|
|
A4
|
Relay
B, N.O.
|
C6
|
Not
Used
|
|
A5
|
Relay
B, Common
|
P1
|
AC
Power (Hot)
|
|
A6
|
Relay
B, N.C.
|
P2
|
Not
Used
|
|
C1
|
RTD
Input Sense
|
P3
|
Not
Used
|
|
C2
|
RTD
Input (+)
|
P4
|
AC
Power (Neutral)
|
|
|
Dimensions
|
|
|
|
|
|
|
|
|